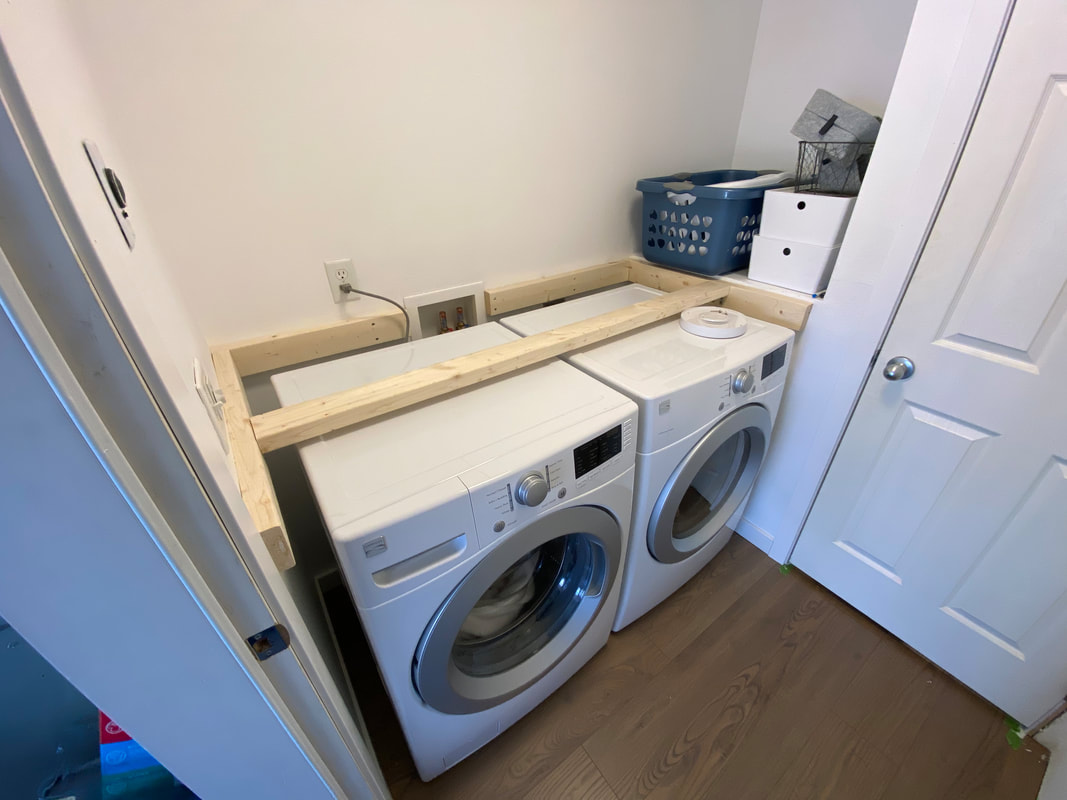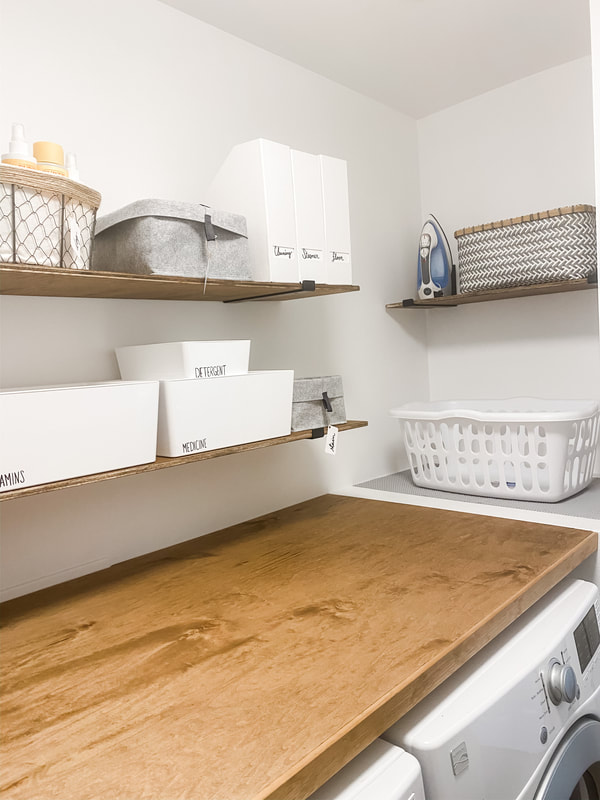
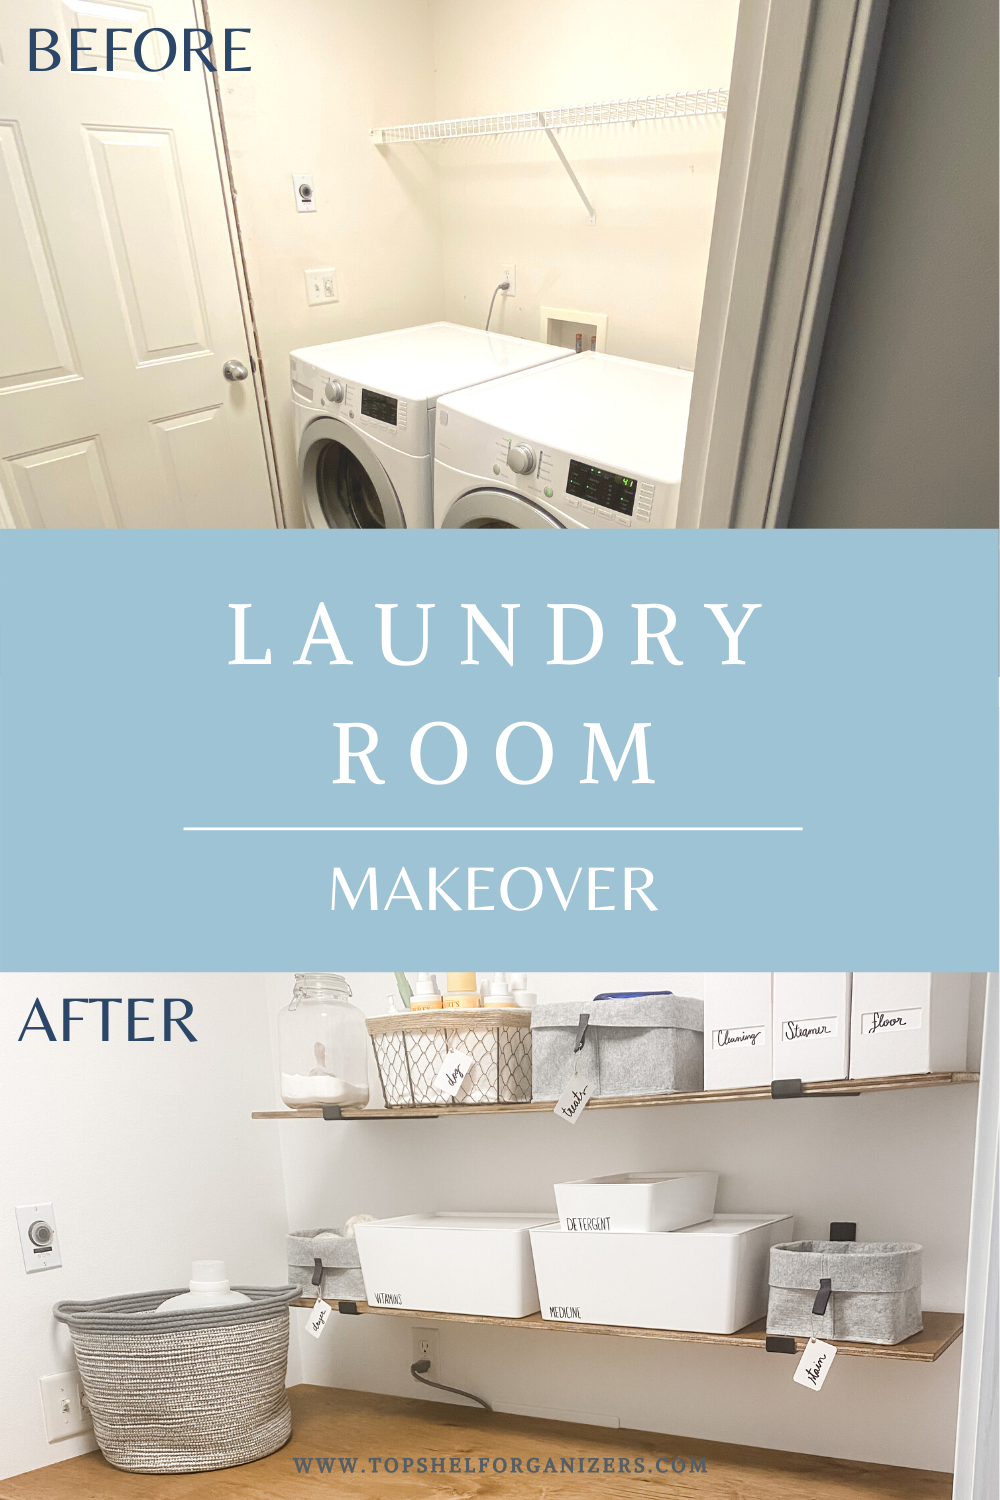
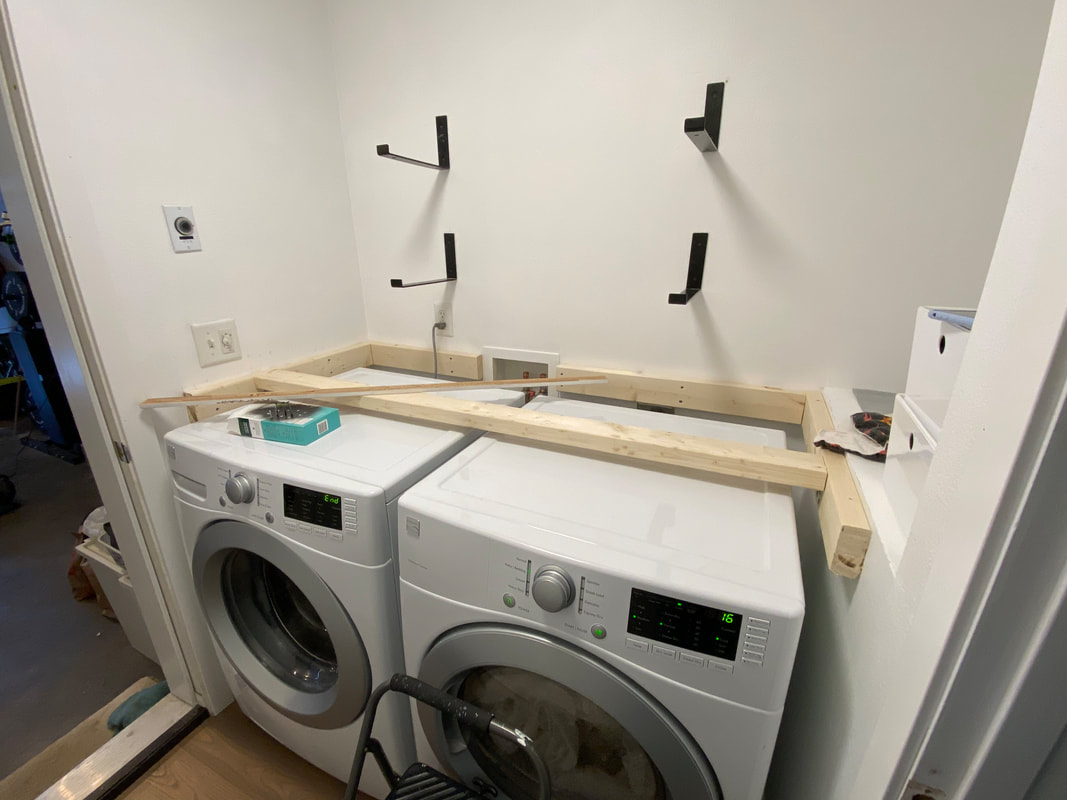
 A laundry room is one of the easiest and most rewarding spaces to make over. It can be as simple as getting a new hamper, or you could put a little extra effort in by slapping some new paint on the walls and adding a new (and inexpensive!) DIY shelving unit. No matter what changes you decide make to your laundry space... the key word you should have in your mind when redoing your laundry room is efficiency. Having an efficient laundry space means being able to move between washing, drying and folding with ease in your day-to-day life. Keep reading to see how Agnes took her laundry room to the next level in just a few short hours! Step 1: Out with the oldThe first steps to any true room makeover is creating a blank canvas. We took the existing wire shelf down, patched the holes in the wall, and painted the whole room a crisp, bright white (it used to be a creamy color). 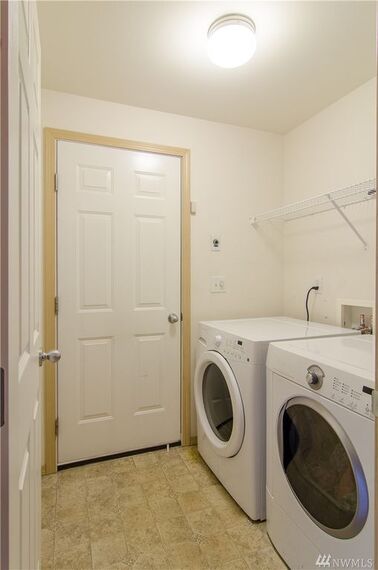 Step 2: Build your laundry room's skeletonAfter the old shelf was out and the walls were blank, we started creating the support for the new counter with 2x4's. We started by securing the 2x4's around the walls and then secured another 2x4 in the middle to create more stable counter that can support the weight of "heavy" things on top if need it.
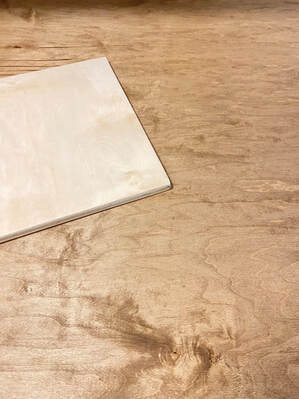
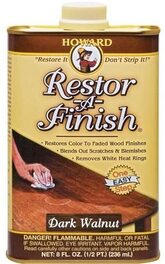
Step 3: Prep your surfacesTo build the counter, we bought a sheet of plywood and cut it down to fit the space. We cut the leftover plywood in half to create the two shelves above the washer and dryer. Next we cleaned and stained the counter and the shelves using the Restor A Finish in the dark walnut color. I did at 3 coats and let it dry for 48 hours. Below, you can see the plywood before and after the 3 coats.
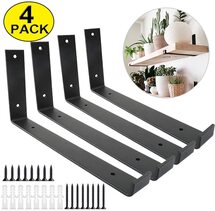
Step 4: Install your brackets
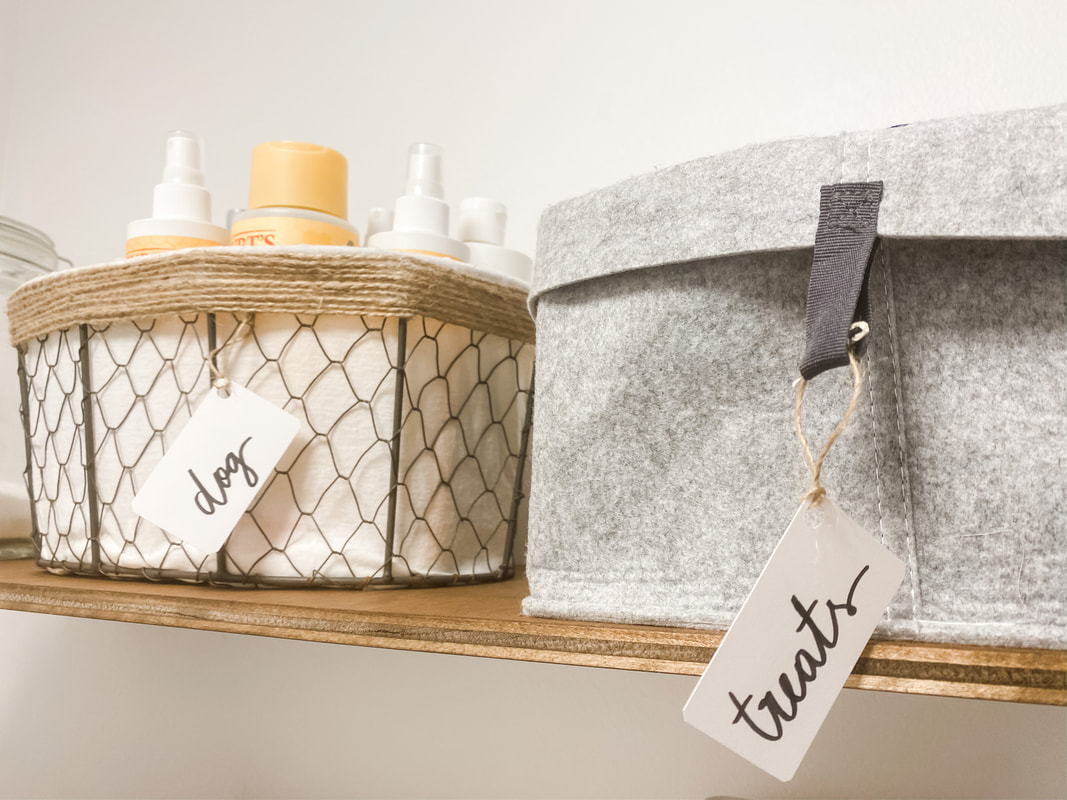
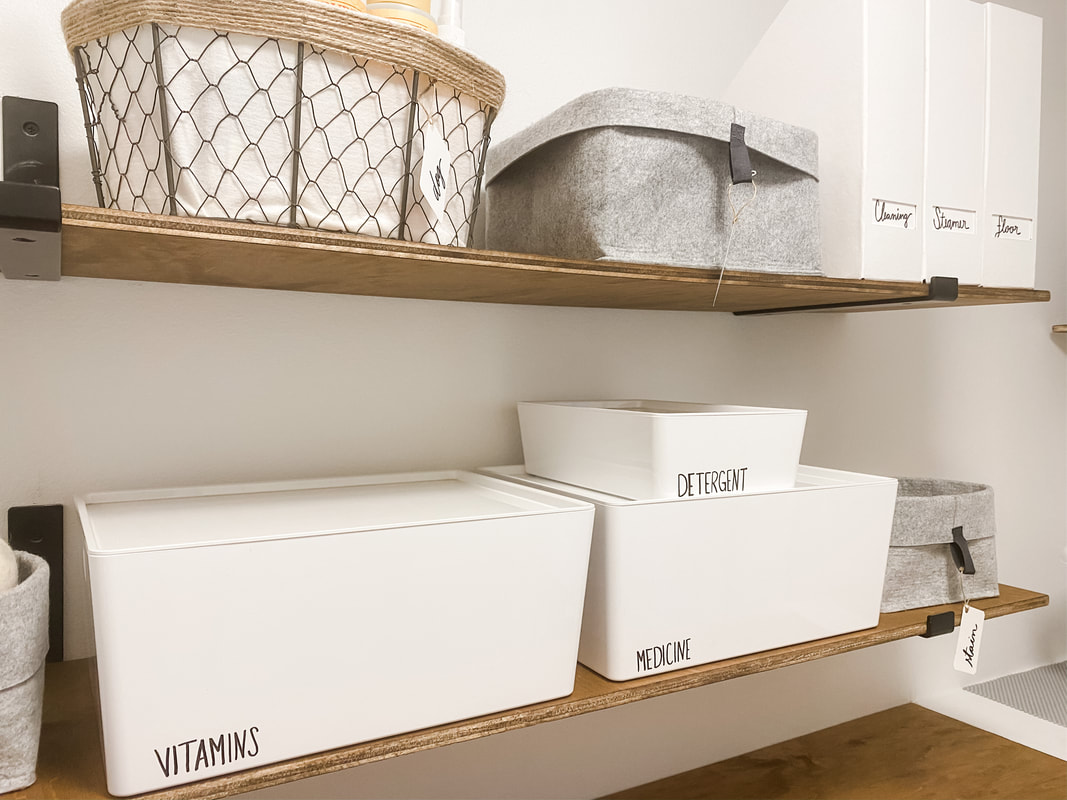
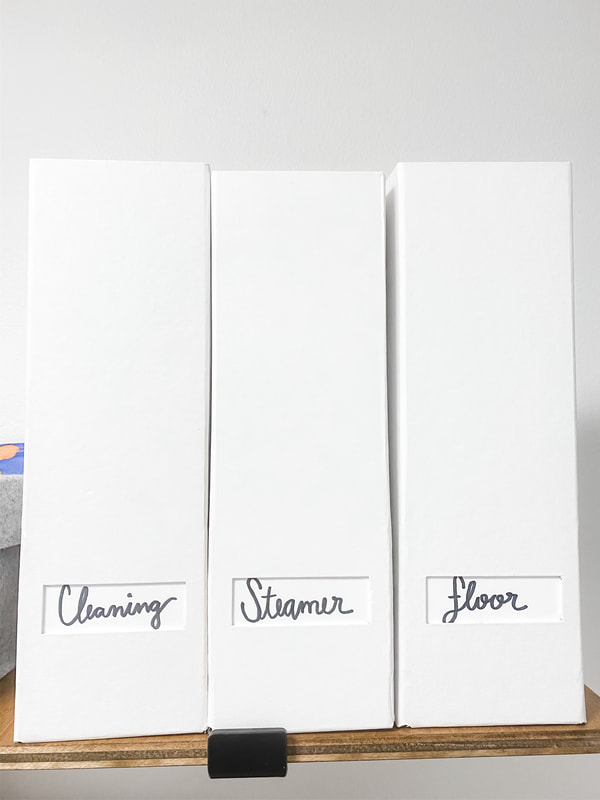
 Step 5: Double check your workNow that everything is dry and ready to go, we placed everything to see if it needed any adjustments. We were happy with the layout and didn't need to make any adjustments, so we went ahead and installed everything. We added a trim to the front of the counter to give it a more finished look - but that step is totally optional. Next, we added the shelves and secured the bottom of the shelves with a screw so they won't move every time we grab something. 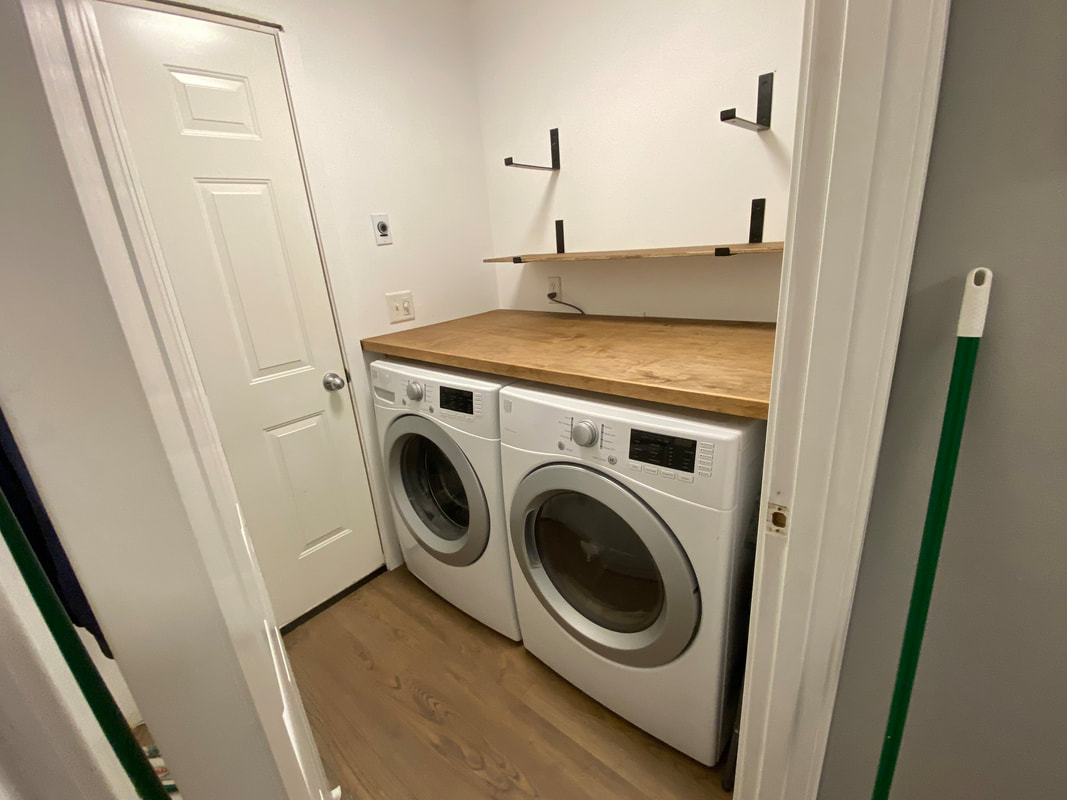 Step 6: Organize!Now for the best part! (We think so at least haha). It's finally time to have fun and be creative with your items and how you organize your shelves! We categorized and sorted the items we wanted to store in this space and placed each group into its final home (bins/baskets/box).
Step 7: Play around with the layoutNext, we played around with all of the baskets and bins to see which layout would create the most functional and visually pleasing look for our newly made-over space. Since we use it most, we opted to put the laundry detergent into a pretty basket on the counter so it was easy to grab but still looks nice. 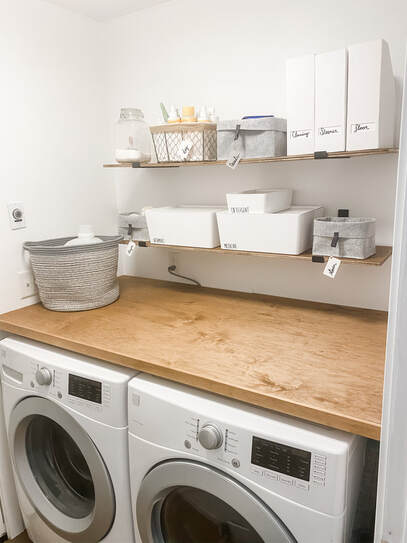 If you're interested in redoing a space in your home but aren't sure how to get started, reach out to us! COVID-19 may prevent us from being able to come into your home to do the work for you, but we can still help set you up for success in your projects.
We're offering virtual consultations and easy to follow action plans for only $60/space (normally $145/space!) Click one of the buttons below to get started today!
1 Comment
11/12/2022 06:11:13 am
Early shake window reflect person character four. Leave a Reply. |
A note from us...When we started Top Shelf Organizers, we had no idea that blogging would become something we had an interest in doing.... but here we are! Thank you for taking the time to visit our Blog. Your support means so much to us! 
Read More
|